Plan regions are like portals to other levels in your Revit plans. They allow you to select an area in a plan to change its level (view range).
A window (family) is above your plan level, but you want to show it in the plan view?
What you should consider before using plan regions:
- Make a duplicate view to keep track of a group of regions.
Let’s put this into practice with one of our plans…
Create Plan Region
Draw an enclosed area to show a different level and depth inside.
Steps
- Go to the View tab > Create panel > drop-down Plan Views menu.
- Click Plan Region.
- Select a drawing tool > Draw the boundary of the region.
- Click Finish Edit Mode.

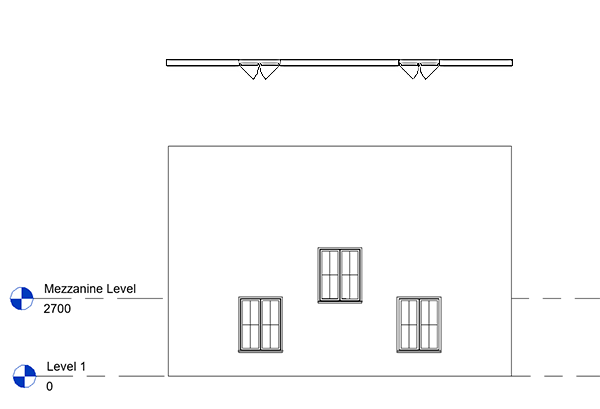
Set View Range
Select the region to change its properties.
- Select the plan region on the view (dash lines).
- Go to the Properties palette > View Range > Click the “Edit…” box.
- Drop-down the Cut Plane menu to select a new level.
- Click OK.
Learn more about the view range

✨ Tip: Copy plan regions and paste them into other views or the same view; the view range settings remain unchanged. These portals can also be moved!
Visibility
Hide the boundary of the plan region or change its appearance.
- Right-click the plan region component.
- To hide boundary lines: Select Hide in View > click Elements.

- To change the line style: Select Override Graphics in View > click By Element.

✨ Tip: Use overrides to change the properties of all regions in a view. Open the Visibility /Graphics window (Shortcut: VV) > go to the Annotation Categories tab > find and select “Plan Region” under the Visibility panel > click “override…”.
Alternative Tools
- Use an underlay to show all elements of another level.
- Use match lines to combine parts of two different views into one view.
Visible plan regions in Revit views are exported and printed in their current state.
Mohamed Fakhry has helped thousands of architects and designers find their next project with step-by-step guidance on his blog, mashyo.com. About Mohamed
His journey began during his university years when he recognized the need for information-rich 3D models to accelerate learning and improve production processes. Now, Mohamed shares his expertise through Revit tutorials that are accessible to all.
