Here are three different ways to export a Revit model to SketchUp. One way is to use a plugin, the other two methods are native exports to DWG and IFC model files.
The plugin retains the original materials and fine finishes, but increases the file size. When exporting to DWG or DXF, the file size and editability are preserved, but no materials are exported. When exporting to IFC, some colors are preserved, but editability is limited and file size increases.
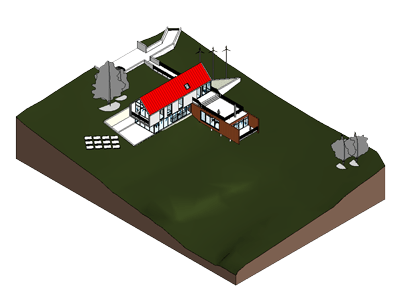
To follow the instructions, you must first open a 3D view.
Method 1 – Geometry and Materials (Plugin)

(via SimLab SKP exporter)
Disclosure: This product comes from an affiliate company that compensates me. This may influence what products I write about and where and how the product appears on my pages. However, this does not affect my reviews. My opinions are my own. Find out how I make money, and read the privacy policy page.
Details
Single user ($99 / year) – Floating / Multiple users ($299 / year).
Steps
- In Revit, go to the Add-ins tab > SimLab SKP Exporter panel.
- Click Export File.
- Locate the destination and then assign a name for the SKP file.
- Click Save.
- Select a SketchUp version.
- Click OK.

✨ Tip: To exclude elements, use a section box or view filters.
Note: To import DWG, DXF, and IFC file formats in Sketchup, go to the File tab > click Import…. > Select the exported file format from the drop-down menu > Select the file > Click Import.
Method 2 – Native Exporter (DWG)

Details
Export Revit’s 3D view to DWG or DXF format.
Steps
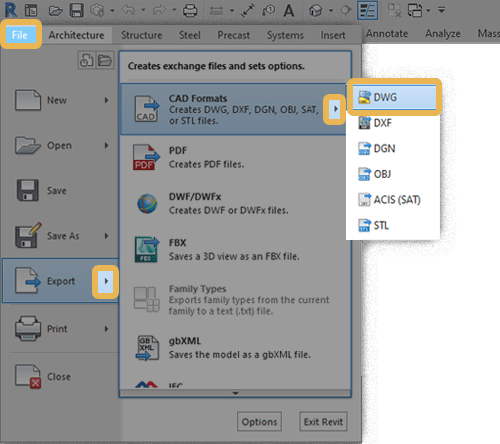
- Go to the File tab > drop-down Export menu.
- Click Export Setups DWG/DXF.
- Open the Solids tab > Select ACIS solids.
- Click OK.
- Go to the File tab > drop-down Export menu.
- Drop-down CAD Formats menu.
- Click DWG.
- Click Next > browse to the destination directory > click OK.

More information on exporting RVT to DWG and DXF.
✨ Tip: To reduce file size, uncheck Export views on sheets and links as external references in the Export CAD Formats window.
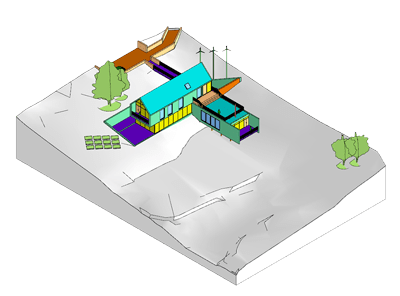
Then, we can smoothen the topography in Sketchup:
- Click twice on the imported model group > Click thrice on the topography.
- Right click on the selected topography > Select Soften/Smooth Edges.
✨ Tip: Use LibFredo6 and Joint Push Pull extensions to push and pull model elements.
Method 3 – Native Exporter (IFC)

Details
Use the IFC export feature in Revit.
Steps
- Go to File tab > Export dropdown menu > Click IFC.
- Assign a name and the destination for the file.
- In the Current selected setup window, Select IFC version IFC 2×3 Coordination View 2.0.
- Click Export.
To control exported elements, go to the File tab > Export dropdown menu > Options > Click IFC Options. Assign IFC classes and types with correspondent Revit objects, families and components.
✨ Tip: After you import the model, you need to double-click a group of elements to enter the edit mode for groups within groups. To ungroup in Sketchup, right-click the group and then select Ungroup.

Learn more about loading IFCs.
Plugin VS. DWG VS. IFC
First method’s advantage is exporting materials and a fine topography. I can use the CleanUp extension for each SKP export to enable firsthand editability, balance file size, and reduce polygon count.
Each family from Revit becomes a unique component in Sketchup because of the parameters assigned to it. Two instances of the same family tagged as “F101-F102” will convert to 2 unique components.
Textures altered for transparency or shade are imported in their original state, since SketchUp doesn’t support such alterations.
Table 1 shows statistics for each of the three methods.
| Method | Plugin | DWG | IFC |
|---|---|---|---|
| Detail | Medium | Medium | Medium |
| Edges | 437,051 | 316,728 | 545,133 |
| Faces | 213,717 | 166,471 | 343,793 |
| File Size | 32.2mb | 17.9mb | 64.6mb |
| Post- CleanUp | 21.1mb (-32.3%) | 17.1mb (-4.5%) | 46.9mb (-27.4%) |
✨ Tip: All formats mentioned in this article (skp, dwg, dxf, ifc) can be viewed online with the free Autodesk Viewer.
Mohamed Fakhry has helped thousands of architects and designers find their next project with step-by-step guidance on his blog, mashyo.com. About Mohamed
His journey began during his university years when he recognized the need for information-rich 3D models to accelerate learning and improve production processes. Now, Mohamed shares his expertise through Revit tutorials that are accessible to all.
